


OKPAY eWallet Guide
1. What is a Digital Wallet Service?
A Digital Wallet (also known as eWallet) allows users to make electronic transactions quickly
and securely. A Digital Wallet functions much like a physical wallet. The digital wallet is a method of
storing various forms of electronic money (e-cash), the digital wallet has also evolved into a service that
provides internet users with a convenient way to store and use online shopping information.
2. OKPAY eWallet Overview
OKPAY Company offers an advanced eWallet solution for personal and business use. Create an additional
eWallet for personal shopping, education or business. Multi-Wallet platform allows setting up various
payment settings, creating a separate eWallet for each Website/Business thus diversifying payments and
making financial management easy and convenient.
Set up your business e-payments processing wisely. All payment options can be conditionally divided by 2
basic principles: refundable and non-refundable. For example any credit card payment, some
e-currencies can be refundable and thus the payment you receive can be reversed (due to a chargeback).
Refundable payments can be withdrawn only after the certain Enrollment period.
OKPAY e-currency (OK USD, OK EUR, OK GBP, OK CHF, OK RUB and 14 other currencies) is non-refundable.
You will not encounter with chargebacks or reversed payments paid to you via OKPAY e-money. Also many
additional supported payment options are non-refundable as well. Non-refundable payments are
processed instantly, thus available for withdraw right away.
3. Managing eWallets
Open www.okpay.com website to create an account in OKPAY.
Locate the main panel on top of the page:

Click on “Log In” link to open your OKPAY account – this will bring you to the next page “My Account”
overview.
In the Left side of the page locate a “Wallets and Currencies” section:
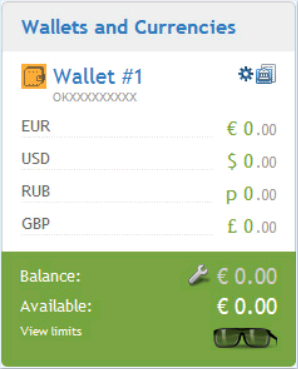
This section features your OKPAY Wallets: name of the Wallet, Wallet ID, list of enabled currencies,
currency balance as well as total Balance and Available balance. If you have already created additional
Wallets they will be featured in that section as well.
Open your OKPAY Profile and locate “Finance” section:
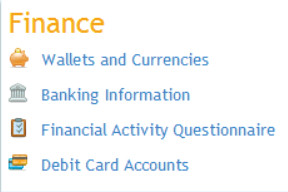
Click on the “Wallets and Currencies” link – this will bring you to the next page.
“Wallets & Currencies” overview page displays active Wallets and balances.

3.1. Creating Additional e-Wallet
Use the “Click here” link to add additional Wallet (for example a Wallet for your business) to your OKPAY
Profile:
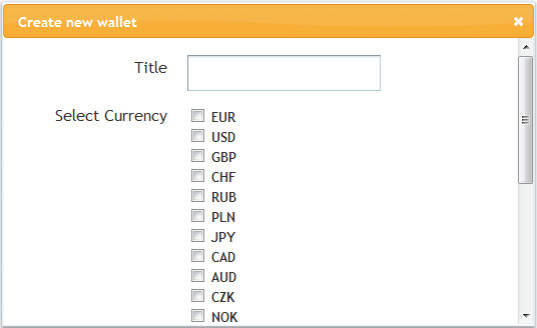
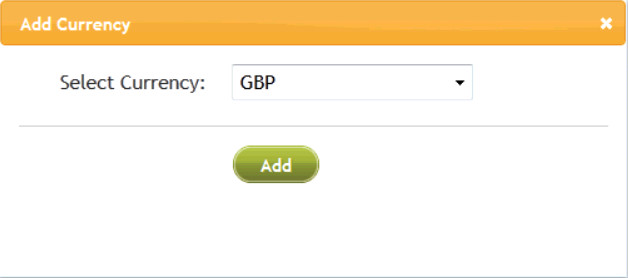
Enter Wallet title and select currencies.
Then click on the “Add” button to proceed. You will be forwarded to the Properties of a newly created
eWallet.
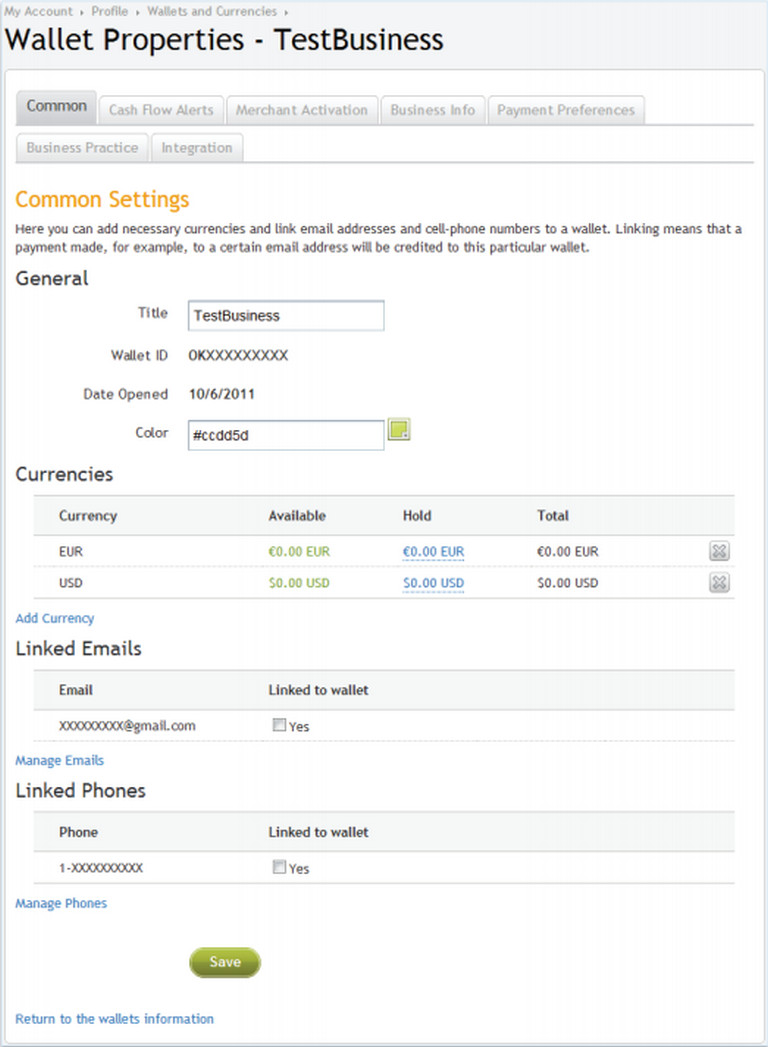
On the Wallet properties page you will find General, Currencies, Linked Emails and Linked
Phones sections.
3.1.1. Manage Currencies Section
In the Currencies section you can add or remove currencies to your OKPAY eWallet. Additional currency
can be added by clicking on the “Add Currency” link.
Use the “X” button to remove unnecessary currencies
3.1.2. Manage E-mails Section
In the “Manage Emails” section you can link one of your email addresses to this Wallet. OKPAY recommends
creating additional email addresses for each eWallet. Click on the “Manage Emails” link – this will bring
you to your Profile > Emails section:

To add a new email address - enter it to the appropriate box and click on “Add” button:

You will see a note that a confirmation message has been sent and you need to click on the link in the
message to complete verification of that email address.

Open your email and check your Inbox folder:

If you can not find a message from OKPAY you might also consider checking the Spam/Junk folder.
If you did not receive the message in the next 30 minutes you can sent a confirmation email again.
Click on the green “Tick” icon to send another verification message.
If you did not receive the message in the next 30 minutes you can sent a confirmation email again.
Click on the green “Tick” icon to send another verification message.
3.1.3. Manage Phones Section
In the “Manage Phones” section you can link one of your mobile phone numbers to this particular Wallet.
Click on the “Manage Phones” link – this will bring you to your Profile > Phones section:

To add a new cell phone number - click on the “Add” button:

Enter the Mobile Phone Number without a country code in the right box (default country code will be
entered automatically based on your Address settings). If you wish to enter another country code you can
insert it in the first box.
From the Phone Type menu select a Mobile.
From the Phone Type menu select a Mobile.
IMPORTANT NOTE:
Mobile Phone number is required to receive wallet notifications; any other phone types will not work.

Click on the “Send Validation Code” button to send a message with a validation code, than click on
“Enter Code” button to complete mobile phone verification.
OKPAY has just created an additional OKPAY Wallet and assigned Email Address and a Mobile Phone number
to it.
3.2. eWallet Preferences
Go back to your OKPAY Profile
Click on the “Wallets and Currencies” link.

Click on the “TestBusiness“ wallet name to edit Wallet Preferences.
3.2.1. Common

“Common” tab contains general Wallet properties such as: Title and Color, Currencies, Linked
Emails, Linked Phones.
3.2.2. Cash Flow Alerts
The “Cash Flow Alerts” tab includes various alerts that you can setup for your Wallet:

You can enable notification “Send Cash Alerts” options for the Money received as well as for Money sent
operations.
3.2.3. Merchant Activation
The “Cash Flow Alerts” tab includes various alerts that you can setup for your Wallet:

IMPORTANT NOTE:
For additional information regarding Merchant Account activation please refer to the
Merchant Activation guide.
3.2.4. Business Information

“Business Info” tab contains business information on the selected wallet. Refer to this tab to edit your
business information such as:
- Title (your Company name);
- Category (business category or type of business);
- Website (website of your company);
- Description (enter the description of your business, it can be a few words describing a service you provide or description of the offered products);
- Logotype (attach an image file your business logo, the image must be a rectangular with a 120x120 px size);
Customer Support section contains the support line Phone number, Email address and the URL page
link that you can enter for your clients convenience.
IMPORTANT NOTE:
Please note that the only information payer will see during checkout is the Business Information of your
OKPAY Wallet.
3.2.5. Payment Preferences

“Payment Preferences” tab contains payment settings for your Business
(Wallet).
There are 3 main sections:
- Payment Receiving Preferences;
- Accepted Payment Instruments;
- Payments by Country.
Use Payment Receiving Preferences to set payer preferences as well as the system commission option.
Accepted Payment Instruments section allows to enable or disable processing of certain payment options.
Please be aware that some of the payment options (for example Sofort) are refundable despite the fact
that OKPAY e-currency itself is non-refundable. This is why we have created an enrollment period.
Depending on your businesss types and needs you can always tune your payment processing accordingly.
Business Practice section contains business-questionnaire.

3.2.6. Integration

“Integration” tab contains the additional integration settings such as:
- Auto Return URLs (auto-return URL allows you to forward your customers from the checkout page back to your website upon successful payment);
- Payment Notification (IPN) (allows you to enable payment notifications and specify a notification URL);
- API Access (enable or disable API access for your Business/Wallet).
3.3. eWallet Banking Information
On the Account Overview page locate the “Wallets & Currencies” section:

The small “Bank” icon in the top right is related
to the particular Wallet banking details. It can be
used to find out the OKPAY Wallet banking
information.
IMPORTANT NOTE:
Each OKPAY Wallet has unique banking details - “Details of Payment” section contains Wallet ID number.

On that page you will find required banking details information for the wallet replenishing.
IMPORTANT NOTE:
“Details of Payment” box with your OKPAY Wallet ID information is very important and it is crucial to
specify that in the wire transfer.
Depending on the currency that you want to receive on your OKPAY Wallet (USD, EUR, GBP, CHF, RUB)
select appropriate banking details. You can also exchange currencies later in your OKPAY account by
clicking on the “Currency Exchange” operation:

3.4. Transfers Between eWallets
Please note that as soon as you will create additional OKPAY Wallet you will find a new operation
“Internal Transfer”.


Specify the Wallet “From” and Wallet “To”, enter the amount, comment if needed and make a transfer.
3.5. Closing eWallet
Open your OKPAY Profile and return to the “Wallets & Currencies” section:

In the right side of the wallet list locate an “X” button. Click on it to remove additional wallets.
IMPORTANT NOTE:
Please note that you can not remove the main Wallet #1 as it is the main Wallet of your OKPAY account


0 comments
Post a Comment